Full-cover water blocks, or monoblocks as they’re often called, are better than standard gaming CPU water blocks for a few reasons. Firstly, they look fantastic, adding a larger area of water-cooled awesomeness to your motherboard rather than a single small block. They can also water-cool more of the hot spots on your motherboard than the CPU, such as your VRMs and chipset. This means that less heat will be dumped into your case and instead transferred straight to the radiator, which can be really useful with mini-ITX systems.
Finally, using a monoblock can greatly reduce the number of ports you have to plumb into your water-cooling system. Installing separate blocks for chipsets and VRMs can double treble the number of inlets and outlets, and a full-cover block cools some or all of those areas with just two ports. The process of installing a full-cover waterblock can be quite involved, though, so, in this guide, we’ll look at how to find one for your motherboard, how to install it, and check if it’s working properly.
IDENTIFY MOTHERBOARD MODEL
Making sure you identify the correct full-cover block for your motherboard is essential, as even a slight variation could mean it won’t fit. You’ll need your exact model number or name, including any suffixes such as ‘WiFi’, as there can be small component differences even between similar models.
DO A GOOGLE SEARCH
There are dozens of water-cooling manufacturers, but only a handful offer full-cover motherboard blocks. A great way to identify a block for your board is to Google ‘full cover block’ with your motherboard’s model name. This can be especially useful for older motherboards, and may even find you some used products on auction sites.
CHECK MANUFACTURER COMPATIBILITY
Another way to locate a compatible full-cover block is to use water cooling manufacturers’ compatibility lists. Both EK and Bitspower offer these features on their websites, with the former allowing you to enter your motherboard’s model name to reveal all compatible water blocks.
PICK BLOCK TOP MATERIAL
It’s likely that there will be different options for the top material of your blocks, such as clear acrylic or black acetal. Your decision here will largely depend on your choice of other components. If you intend to add other clear components to your loop that exposes the coolant, it’s a good idea to use a similar-looking full-cover block.
CHECK COMPONENT ACCESS
Full-cover blocks usually take up a lot of space, so it’s important to check how a block might impact other components. Your M.2 ports might be trickier to access or suffer reduced airflow, for example, in which case it might be wise to put your SSD in a different M.2
CHECK CURRENT TEMPERATURES
Before you install the water block, run Prime95’s smallest FFT test and load your motherboard’s monitoring software to check the VRM and CPU temperatures. The VRM temperature isn’t always shown, but at the very least, make sure you check the CPU temperature before and after your efforts.
IDENTIFY MOTHERBOARD SCREWS
On the rear of your motherboard, there will be screws you’ll need to remove in order to detach the heatsinks. These locations can stretch around most of the motherboard, so familiarise yourself with their locations and identify them all first.
USE A HAIRDRYER
If you find the heatsinks tricky to detach, that might be because thermal pads or paste have stuck them fast to the motherboard. Warming them to loosen the material can help to work them loose – using a hairdryer on a hot setting from ten inches away for 20 seconds usually does the trick.
REMOVE SCREWS
Now go ahead and remove the screws, with the motherboard positioned face down and the heatsinks supported from underneath using a towel or microfiber cloth. You’ll likely need a micro screwdriver for this job, and you’ll need to be very gentle, so you don’t scratch the rear of your motherboard.
DETACH FAN AND LIGHTING CABLES
You often have to contend with wires on the motherboard for RGB Lighting and chipset fans, so make sure you detach these cables before yanking off the heatsinks, as the wires can be easily damaged.
LIFT AWAY HEATSINKS
With any cables detached, go ahead and lift the heatsinks off the motherboard. To do this, hold the towel or cloth underneath the heatsinks, then flip over the board while you’re holding the heatsinks in place. You can then lift the heatsinks off the motherboard from above.
REINSERT SCREWS
It’s vital to keep the heatsink screws safe in case you need to return the motherboard to its original state, especially if you might want to sell it later. To do this, replace the screws into the holes in the heatsinks and then place them in your motherboard’s box.
REMOVE THERMAL PADS
Quite often you’ll find thermal pads are left behind on the motherboard when you remove the heatsinks. You’ll need to remove these pads in order to install the new block. Use a scalpel or spatula to gently lift them off. Ideally, you want them intact.
REPLACE THERMAL PADS
Next, place the pads back onto the heatsinks from which they were lifted. If you damage them, it’s possible to obtain replacement thermal pads from companies such as Gelid or Alphacool.
CLEAN SURFACES
With the pads and heatsinks removed, clean the surfaces of the VRMs, chipsets, and your CPU to ensure your new cooling gear can perform as well as possible. Isopropyl alcohol can remove paste or pad residues, as can a dedicated thermal paste (TIM) cleaner, along with a lint-free cloth.
TEST-FIT WATERBLOCK
Full-cover blocks are heavier and larger than normal water blocks and will slot into place among dozens of other components on the motherboard. For this reason, it’s best to do a test-fit first without any pads or paste being applied, so you know how to fit it quickly.
APPLY THERMAL PADS
Thermal contact between the block and VRMs is usually achieved with thermal pads, so start by trimming them to size if necessary and applying them to the motherboard. Remember to remove both sides of the protective plastic first.
APPLY THERMAL PASTE
The CPU will need thermal paste applied as normal. You might want to consider using liquid metal paste rather than standard ceramic paste here, in order to maximize cooling for your CPU.
CONNECT RGB CABLES
If your block includes RGB lighting then connect the cable for the lighting before fitting the block. This way, if the RG B header sits between your block and other components on the motherboard, it will be much easier to access.
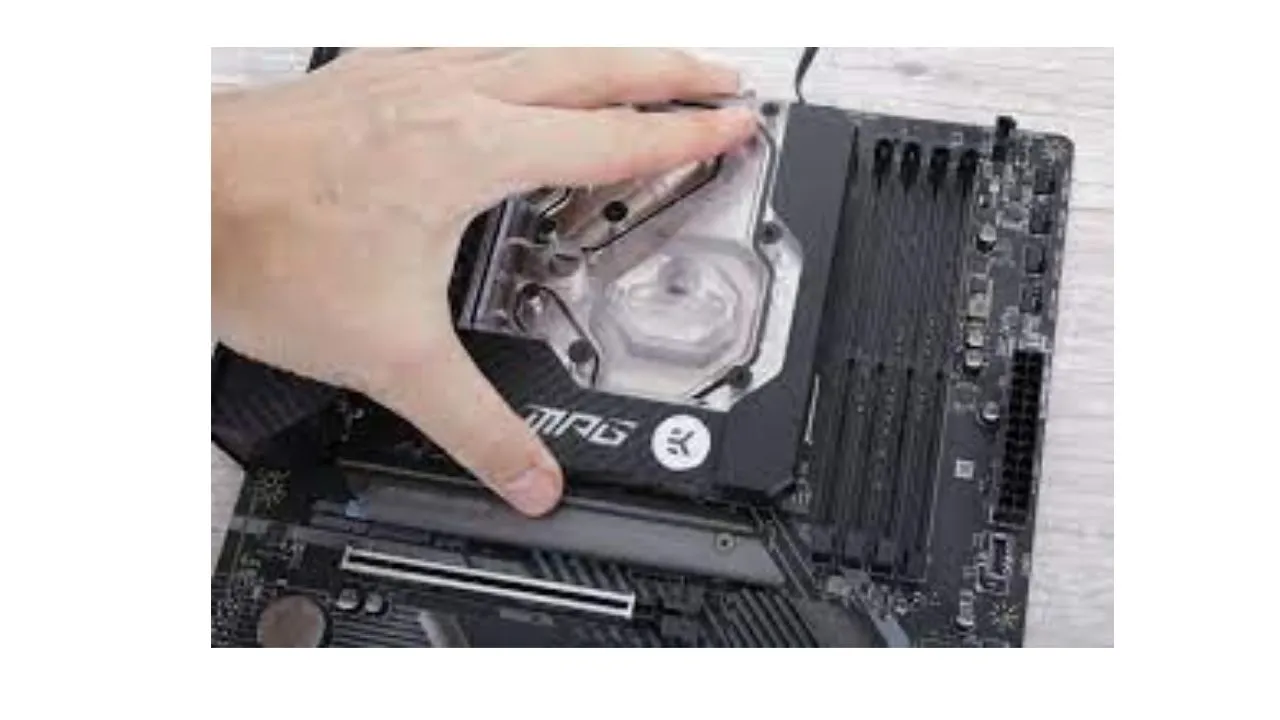
FIT WATERBLOCK
With the motherboard ready for its new water block, place the motherboard on a flat surface and then lower the block into place. Try to prevent it from sliding around, as this can affect the thermal paste and pads, and reduce the quality of contact between the block and your components.
SECURE WITH SCREWS
Follow the block’s instructions to install the screws, flipping the board over and supporting it from underneath with a towel or cloth, so the block is held in place first. Insert the screws with a few turns each to start, then tighten them a few more turns at a time, moving diagonally between screws, until they’re all tight.
Also See:
- How Many Fans Should a Gaming PC Have
- How To Apply Liquid Metal Paste
- How to install Linux apps on Chromebook
- How To Enable TPM in Windows 11
- How To Play Xbox Games On PC With Disc – Xbox 360 Games on PC With or Without Emulator
- How to use Gamecube Controller on Steam
- How to Use PS4 Camera on PC
Author
-
by
-